A couple of years ago my parents took my me and my boyfriend to Zuni Cafe in San Francisco for my birthday. Along with their famous roast chicken, we were all impressed by a whole wheat pasta dish. It was simple and a little bit homely, but it was really good. Just a mixture of sauteed radicchio and capers. Of course, something that simple would be difficult to reproduce, and although I have tried, it has never turned out quite right. The radicchio transitions swiftly from being crisp and fresh to limp and bitter. After a mediocre attempt for lunch, I decided to try a little bit of a different approach for dinner. Instead of a pasta dish, I made the salad equivalent. Fresh chopped radicchio, a generous sprinkling of briny capers, chunks of creamy mild mozzarella cheese. Showered with a rosemary and thyme spiked balsamic vinaigrette and success was achieved.
Tuesday, March 30, 2010
Monday, March 29, 2010
Oatmeal Wheat Bread
The answer, of course, is yes.
One of the things that I am really coming to value, as I further my cooking knowledge and capabilities, is the ability to control ingredients. It allows me to make real choices about what I want to eat or not (including deciding not to eat too many of those Compost Cookies). Being able to make and eat freshly baked bread, without preservatives, additives, and chemicals is, in my opinion, really liberating. And realizing that you can make bread that is delicious and wholesome without sweat or tears? Empowering. Self-reliant. Delicious.
Rustic artisan bread is impressive, but sandwich bread is a real staple. This recipe is so simple, and the ingredients are all so straightforward and good. The result is soft and slice-able, the crust is just a little bit chewy and crunchy. The flavors of the honey, wheat, milk and oats come together to make something that is warm and mild and comforting. It's so easy with the mixer. As usual it's just takes some organization time-wise.
Oatmeal Wheat Bread
Adapted from Gourmet
1 cup whole milk
1/2 cup old-fashioned rolled oats (not quick cooking)
1/4 cup warm water
1 Tbsp active dry yeast
1/4 cup honey
2 Tbsp olive oil* (+ more for oiling the bowl and pan)
1 1/2 cups stone-ground whole-wheat flour
1 cup unbleached all-purpose flour
1/2 Tbsp salt
Heat the milk in a saucepan over low heat until almost (but not quite) boiling. Remove the pan from the heat and stir in the oats. Let it cool of a little, until it is warm, not hot.
Stir together the warm water, yeast and honey in a small bowl. Let stand until foamy (if it doesn't foam, start over with new yeast). Stir the yeast mixture and the olive oil into the warm oats and milk.
Stir together the wheat flour, all purpose flour, and the salt in a separate bowl, and mix with the wet ingredients.
Put everything in the stand mixer with the dough hook attachment. Set to level *2* and let it knead for about 10 minutes, scraping down the sides of the bowl occasionally. It should be smooth, soft and elastic (and very sticky).
Oil a large bowl (and your hands). Form the dough into a ball and transfer into the bowl, making sure that the dough-ball is lightly coated in oil. Cover the bowl loosely with plastic wrap, and place it in a warm area (I like to put it in my gas stove, which is just a little bit warm from the pilot light when it's off). Let it rise until doubled in size, 1 to 1 1/2 hours.
Lightly oil a 8x4 inch loaf pan. Turn the dough onto a lightly floured surface, and knead several times to remove air. Shape the dough into a rough square, and roll like a cigar. Place it, seam side down in the prepared loaf pan. Cover the pan loosely with plastic wrap, and put it in a warm place for a second rise. Let it rise until doubled in size, about 1 hour.
Put the rack in the middle of the oven, and preheat the oven to 375.
Beak until the bread is golden and loaf sounds hollow when tapped on the bottom, about 35-40 minutes.
Remove the bread from the pan, and cool on a rack completely, about 1 1/2 hours, before slicing.
Cookie Overload
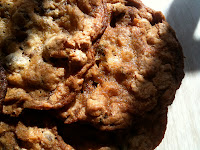
While I can't quite claim that these cookies are savory, they at least make an attempt to balance sweet components with salty ones. Momofuku Milk Bar, in New York, has built quite a reputation for its sweet creations, especially for their Crack Pie, and aptly named Compost Cookies.
I chose to make these cookies for several reasons (other than their incorporation of salty ingredients). For one thing, it's an open and adaptable recipe, that is different from any cookie recipe I have come across. The equation is simple: a silky beaten-into-submission cookie dough base mixed with 1 part sweet and 1 part salty ingredients. Your imagination, or the contents of your cabinets are the limit when it comes to the salty and sweet ingredients. Suggestions include: chocolates, caramels, candies, coco-puffs, bugels, chips, cheese-its, pretzels, and corn flakes. It's like a kitchen sink salad or quiche, but in cookie form. Unfortunately, just before making these I watched an episode of "Jamie's Food Revolution," where Jamie Oliver comes to America to confront the Obesity Epidemic, so I ended up feeling incredibly apprehensive about everything that went into these cookies. I want to join the revolution!
The other reason, probably the real reason I chose to make these cookies is this:
Kitchenaid Mixer initiation. Up until yesterday evening, I mixed everything by hand. While not a process that particularly bothers me, there are some things that are simply not achievable. Like the ten-minute-straight beating that these cookies required. Welcome to my kitchen, shiny new Professional Kitchenaid Mixer.
The conclusion: these cookies are very rich and tasty, deliciously crispy and buttery, but in the future I want to try to use my mixer for some good healthy whole wheat bread.
Momofuku Milk Bar Compost Cookies
1 cup unsalted butter (2 sticks)
1 cup granulated sugar
3/4 cup brown sugar
1 Tbsp corn syrup
1 tsp vanilla extract
2 eggs
1 3/4 cups all purpose flour
2 tsp baking powder
1 tsp baking soda
2 tsp kosher salt
1 1/2 cups sweet baking ingredients (chocolate, raisenettes, rollos, cocoa krispies, english toffy)
1 1/2 cups snack foods (chips, pretzels, goldfish)
In a stand mixer with the paddle attachment, cream the butter, sugars, corn syrup on medium-high for 2-3 minutes (until fluffy and pale yellow).
On a lower speed, add the eggs and vanilla. When they are incorporated, increase the speed to medium-high and mix for an additional 10 minutes. When it is done, it should be pale and fluffy, and almost doubled in size.
Lower the speed and add the flower, baking powder, baking soda, and salt. Mix it for 45-60 seconds, just until everything is incorporated (don't over mix at this stage).
Still mixing on low, add in the additional ingredients of your choice, and mix until evenly incorporated.
Line a baking sheet with parchment paper and scoop the dough into 6 oz balls (this is pretty large). It will make about 16 cookies altogether. Space the cookies so that they are not touching, and cover the tray with plastic wrap.
The whole tray needs to be refrigerated for at least 1 hour (it can keep for up to a week). My suggestion is to place 1 or 2 (preferably 2, because the cookies are very large and need all the room they can get) more baking sheets underneath the one with the cookies on it, then when everything is chilled, quickly redistribute the dough (don't forget the parchment paper underneath) onto the extra chilled sheets. Alternatively you can chill the cookies on several sheets, but then you will need to free up a lot more space in your fridge.
Pre-heat the oven to 400
Take the plastic wrap off of the cookies, redistribute them leaving plenty of space between each cookie. Bake for 9-11 minutes (mine took several minutes longer), they should brown around the edges and not be too pale and doughy in the center.
Cool the cookies completely on the baking sheets. Don't eat too many!
Sunday, March 28, 2010
Savory Caramelized Onion Jam
I have gotten myself into a pickle lately. I like to bake, but I crave savory things more than I crave sweets. This has lead to a lot of baked goods being foisted on my effortlessly thin boyfriend, which I think, has him a little weary of sweets, and wary of my enthusiastic baking sprees.
Long story short: I have started trying to bake more bread, and since the jar of blueberry jam I made remains unopened in the fridge, I decided it was time to make some onion jam. Mission accomplished: crusty bread smeared with a savory spread.
The only thing to watch out for with this jam is time. All that it really requires is some slicing and some stirring, 4 hours of stirring to be exact. Maybe this would be good to do while you are doing your taxes, then you are forced to stay home, and you get to take consistent little stir-breaks to clear your head.
Caramelized Onion Jam
Adapted from the Los Angeles Times
5 pounds yellow onions (about 6 large onions)
1/2 cup olive oil
1 Tablespoon salt
*Be careful stirring the hot juicy onions, I kept splashing myself. It burns!*
Remove the skins from the onions and slice them in half and then in 1/4 inch slices lengthwise. Place the sliced onions into a large, heavy bottomed pot (7 quart or so). Pour the oil and salt over the onions, and stir to combine.
Set the mixture over medium heat, and cover. Stir it every 10-15 minutes, to keep the mixture from sticking to the bottom of the pan.
After 25-30 minutes, the onions will be very soft, and will begin sticking to the bottom of the pan (and browning).
At this point, reduce the heat to low, and cook for an additional 25-30 minutes, continuing to stir every 10-15 minutes. By the time this step is done, the onions will be silky and swimming in moisture.
Once it has gotten to that stage, remove the lid, and increase the heat back to medium. Cook, stirring frequently, until the liquid has evaporated, and the mixture becomes golden. This will take about 25-30 minutes.
After that, reduce the temperature to low, and continue cooking, stirring every 15-20 minutes until the onions become deeply brown. (this will take an additional 2 hours). Once they are deep brown, watch them more closely, and continue to cook them on low, stirring more frequently, for another hour. Making sure they do not dry out. When they are done, they should be reduced to a deep reddish brown marmalade.
Put the mixture into a jar, let it cool of a little bit, and stick it in the fridge (or eat it right away). It should last up to a week. Spread it on everything.
Wednesday, March 24, 2010
A Coo Coo Birthday
Tuesday, March 23, 2010
Jelly, Not Jell-o
Growing up, my mother always chose natural foods for our family. This meant virtually no jell-o. Because of that, I never formed the nostalgic childhood memories involving jell-o that so many of my peers claim to have. What I do have, however, is an appreciation for making things from scratch, and using fresh ingredients.
When I came across this recipe, on one of my favorite blogs, Rachel Eats, I thought that it sounded so refreshing. I really enjoy baking, but sometimes it makes me feel a little stuffed. (Unfortunately, there is such a thing as too much butter.) In a nutshell, this Jelly is a very simple soft-solidification of bright, fresh citrus juice, lightly spiced with cardamom to add a bit of mystery and complexity.
This recipe is very forgiving. The original recipe used oranges, lemon, and pomegranate juice, but I had some blood oranges instead of pomegranates, and although I am sure it tasted different, it definitely did not taste wrong. It tastes almost like a creamier and less chilly sorbet. Clean, fruity, and refreshing, but without the brain-freeze headache.
Simply squeeze the juice out of 5-7 large oranges & a lemon, & in my case blood oranges, reserve some thin slices of rind (no pith), mix in some cardamom pods (with seeds), simmer (but not boil), let sit for 15 minutes, stir in gelatin, divide into serving dishes, and chill.
Blood Orange Jelly
5-7 large oranges
2/3 cup caster sugar*
4-5 blood oranges (or 2 pomegranates)
1 lemon (unwaxed)
6 whole green cardamom pods (lightly smashed/split)
1 Tablespoon of gelatin powder (or 5 sheets of gelatin)
Cut a few strips of lemon zest and orange zest and set aside. Juice the oranges, blood oranges, and the lemon. Pour the juice into a stainless steel pan, add the zest, the sugar, and the cardamom pods (including the seeds).
Bring the mixture to a low simmer, not a boil, then cover the pan, turn the stove off. After sitting for 15 minutes, mix the gelatin in, making sure to stir it thoroughly to make sure it dissolves completely.
Divide the mixture into 6-8 glasses and refrigerate for 4-5 hours or overnight.
*To make caster sugar, just pulse some regular sugar in a coffee grinder until it is finely ground. It should be somewhere between the fineness of regular sugar, and powdered sugar.
Saturday, March 20, 2010
Baked Polenta My Way
It seems like I have been hearing a lot about the ease of baked polenta lately, but nothing really made me feel like I needed to try it. I guess my family made old-fashioned stove-top-stirred polenta when I was young enough that I never had a chance to develop a fear of the process. It's really not that hard. However, I was looking through Judith Jones' new cookbook, The Pleasures of Cooking for One, and I really liked the looks of her recipe for "Baked Polenta with Vegetables." Mixing the vegetables in with the polenta and cooking everything together is such a nice way to make the polenta dish into a meal instead of a side dish. That was something worth trying.
Baking polenta was a little strange at first. Actually, I was a little worried that it wouldn't work. It felt like I was doing something wrong. I mean, you prepare the vegetables, mix them in with a watery polenta mixture, and then leave it in the oven for a while. That's it. Some cheese sprinkled over in the last couple of minutes, and it's done. And you know what? It was a perfectly cooked, warm, and tasty meal. As I was eating my first taste of baked polenta with vegetables, I thought of all of the different things I could do next time. I mean that as a compliment to the original recipe. It introduced me to a new way of cooking something and it made me want to experiment (with the added confidence that it would actually work).
I decided to simplify, and using ingredients that I found in my fridge I think I came up with a winner, which just emphasizes the versatility of the baked polenta & vegetables idea. You could even take a kitchen sink approach and mix in whatever bits of cheese and vegetables you have hanging around. I ended up using feta, spinach, and garlic. And instead of cooking the vegetables on the stove before mixing them in to the baking dish I just poured some hot water over the spinach to wilt it, and toasted the garlic in the baking dish before I mixed the rest of the ingredients in.
Just as long as the liquid to polenta ratio is correct, you can add and subtract vegetable as you please.
Baked Polenta My Way
1/3 cup polenta
1 cup water (warm)
A couple of handfuls of fresh Spinach
1-2 cloves of garlic (chopped)
1/3 cup crumbled feta cheese
1/2 teaspoon salt
parmesan (just enough to sprinkle over the top)
olive oil
Other things that would have been good: a chopped tomato, some chopped onion or shallot, some chopped zucchini.
Pre-heat the oven to 350
Pour some hot water over the spinach to wilt it, then pour cold water over it, squeeze it dry, and chop it roughly. Put a little bit of olive oil in the bottom of a small baking dish, and add the chopped garlic, place it in the oven and bake it until the garlic is just golden (just a couple of minutes). Take it out and carefully add the cup of warm water, 1/3 cup polenta, the chopped spinach, salt, and feta. Stir everything together, and put it back in the oven.
The mixture will cook for 30 minutes altogether. After about 15-20 minutes, give it a stir to mix everything up (otherwise the vegetables will be mostly at the top and the polenta will be mostly at the bottom). 25 minutes in, sprinkle a little parmesan over the top, then bake for the remaining 5 minutes.
Monday, March 15, 2010
Life A.B. (After Bread)
Homemade bread is a hurdle that every home baker is eventually faced with. There are so many different authorities, techniques, questions, preferences, and problems (both real and imagined), that it can be hard to know where to start.
Luckily, popular bread making techniques are focusing on minimizing the amount of work needed for the proper processes to occur. Two good ones are the No Knead bread, and also the 5-Minute bread: each of which promise to deliver the much desired artisan style loaf. These breads are wonderful tools for the beginning bread baker. They are in essence gateway breads. Once you get a taste of how easy it is to make your own bread, you won't be able to stop.
I was really excited when my brother's best friend showed me this recipe. (My grandma couldn't believe it: a boy baking bread from scratch. Unheard of!) Although I am familiar with yeast from making my own pizza dough from scratch, I have been slow to enter into the world of home-made bread. My excuse is not wanting to put my zillion dollar le creuset in the billion degree oven with it's plastic knob (the metal replacement is in the mail as I type). That is why I was so excited when I saw this recipe: I realized that could bake the loaf on my unbreakable cast iron skillet. It works really well, and the bread tastes delicious!
Sit back, and let time and the ingredients do the work for you.
5-Minute Artisan Bread
This recipe makes enough dough to make multiple loaves. The idea is to keep it in the fridge and keep pulling from it to make fresh loaves.
3 cups luke warm water
1 1/2 Tablespoon granulated yeast
1 1/2 Tablespoon Salt (Morton's Kosher, no iodine)
6 1/2 Cups unbleached all-purpose flour
Mix the ingredients in a large bowl or plastic tub (it is going to rise a lot, so it needs room to grow. I split my dough into two bowls so that it wouldn't overflow). Cover the container loosely, but make sure that it isn't sealed completely. Let it sit at room temperature for 2 hours (at this stage you want it to be a little on the warm side, to encourage the yeast, so don't put it in a cold drafty area).
After 2 hours, it can be used immediately or put in the fridge to be used as desired (it should keep for about two weeks). Either way, when you are ready to bake a loaf, break off a large piece (about the size of a grapefruit), place it on a floured cutting board and shape it with your hands. To shape it you want to cup the dough in a ball in your hands and gently pull it downwards toward the bottom of the ball, creating a smooth circular surface.
Let the dough sit for 60 to 90 minutes. Pre-heat
the oven to 450 with either a pizza stone, or a cast iron skillet on the middle shelf. Place a heat-safe container of water on a shelf below (this will create steam which will improve the crust). Score the top of the dough with a serrated knife, making 4 or 5 parallel incisions. Slide the dough onto the hot pan, and bake for 30-35 minutes, or until golden brown. Let it cool completely before slicing.
Disclaimer: I am not an expert bread-maker! If you have any questions I recommend checking the 5-minute artisan bread website, they have more thorough explanations.
Saturday, March 13, 2010
Chocoholic
My mom loves chocolate. So when my parents visited this weekend, I knew I had to rise to the occasion and bake something chocolate-y. I don't really celebrate St. Patrick's Day (I usually just make sure to wear green so that I don't get pinched), but the great deal on Guinness at my grocery store was definitely something I could get on board with.
My decision was made: chocolate Guinness cupcakes.
I came across this recipe a few years ago at Smittenkitchen. Originally, it was actually an Irish Car Bomb Cupcake, complete with whisky ganache and baileys frosting. I made the entire recipe once, but it made me feel like my heart was going to explode (in a bad way). The plain unadorned cupcakes though? Perfect. They are dark and chocolate-y; rich, but not too sweet. (Plus they are a little less controversial. The drink may be popular, but actual car bombs are definitely not, and for good reason).
Guinness Chocolate Cupcakes
Makes 24 cupcakes
1 cup Stout (such as Guinness)
1 cup (2 sticks) unsalted butter
3/4 cup unsweetened cocoa powder
2 cups all purpose flour
2 cups sugar
1 1/2 teaspoons baking soda
3/4 teaspoon salt
2 eggs
2/3 cup sour cream (I used plain yogurt)
Pre-Heat the oven to 350°
Melt the butter mixed with the stout in a saucepan, and bring to a simmer. Mix in the cocoa powder and remove the mixture from the heat. While it cools*, whisk the flour, sugar, baking soda and salt together. Separately, beat the eggs and sour cream (or yogurt) together until they are well blended. Add the stout mixture to the egg mixture. Once they are fully combined, add
the flour mixture and mix them until they are completely combined. Spoon the batter into lined cupcake tins, distributing it evenly. Bake for about 18 minutes, or until a toothpick inserted into the center comes out clean. Cool the cupcakes on a rack (or eat them hot out of the oven).
*You don't want the stout mixture to be really hot, or else it will curdle the eggs.
Thursday, March 11, 2010
Feed your Accountant
I think that it's easy for us civilians to forget that accountants are people. They have hope, dreams, and feelings, just like the rest of us. And, just like the rest of us, they work really hard. Especially this time of year.
My big brother is an accountant. This time of year he starts working 6 - 7 days a week. His girlfriend, also an accountant, has been working 12 hour days. With hours like those, and deadlines like April 15th, I think that a little bit of compassion and a bunch of baked goods are in order.
That said, I really like making biscotti. It is equally good for breakfast, afternoon, and dessert. Plus, it keeps really well. I have been eyeing this recipe for a while, and am glad to finally have an excuse to make it. Almond extract! Yum!
Just a little something to munch on while they crunch those numbers.
Nonna's Biscotti
From Gourmet
1 cup sugar
1 stick unsalted butter (melted)
3 Tablespoons brandy*
2 teaspoons almond extract
1 teaspoon vanilla extract
1 cup almonds (toasted and chopped)
3 eggs
2 3/4 cup flour
1 1/2 teaspoon baking powder
1/4 teaspoon salt
Mix together the sugar, melted butter, brandy, & extracts. Stir in the eggs and the almonds.
Add the flour, baking powder, and salt and mix until until just combined. Wrap the dough in plastic and chill in the refrigerator for 30 minutes or more.
Pre-head the oven to 350
Once it is chilled, divide the dough in 1/2. Form two loaves, and place them on a baking sheet (I put a sheet of parchment paper underneath). Bake for 30 minutes, then remove from the oven. Transfer to a rack, and cool for 15 minutes. Slice the loaves into 3/4 inch slices with a serrated knife. Arrange the biscotti back on the baking sheet (just pull up and toss the parchment paper), cut side down. Bake for another 20-25 minutes**, until golden. Transfer to a rack to cool completely.
*I don't have brandy, so I left it out. It wasn't a disaster (they were a little on the mild side).
**Mine got pretty toasty on just one side, next time I would try to bake them for 10-12 minutes, then flip them over and cook them for another 5-8 more minutes. (That's how I have done it in previous recipes.)
Pasta for Spring
These are tough times. It's as important for us to get our vegetables, as it is to stretch and pinch our pennies. This is not just a good tasting meal but, I hope, it is also a prudent use of ingredients. A couple of carrots, part of a head of broccoli, a little bit of pasta. I didn't use up all of anything, so there can be carrot sticks left over to snack on, broccoli left over for a frittata, quiche, or omelet (obviously, I am hung up on an egg-broccoli combination, but you get the idea).
I got something like this at a restaurant a while ago, and recreated what I liked. This is what I think it should be: light, bright and simple. It is really flexible, don't stress out if you want to make some changes. I would bet that you have bigger things to worry about.
Pasta for Spring
Broccoli (I used a couple of cups)
Carrots (I used a cup or two)
*You can add/substitute any vegetables of your choice (zucchini is good)
Red onion (I used about 1/3, you could substitute white/yellow onion or shallots)
Garlic (I used 2 cloves, sliced)
Pasta (I used 1 cup of dry penne)
Olive oil
Salt and pepper to taste
Parmesan (optional)
Boil your pasta water and cook your pasta. Meanwhile, chop your veggies into bite sized chunks. Drain the pasta when it is al dente, put it aside in the bowl that you intend you eat from. Drizzle a little bit of olive oil in the bottom of the (now empty & dry) pan used for the pasta. Brown your onions and garlic for a couple of minutes with some salt and pepper, then add the vegetables and cook until they are done to your liking (I like everything a little bit underdone). Mix in the pasta, put everything back into your bowl, and you are done.
Sunday, March 7, 2010
Crunchy Kale
Now that I am cooking my own food, going to farmers markets, and wishing I had a big enough budget for organic produce, I am actually finding myself buying too much kale because I like it so much. I want to eat it, but sometimes I can't fit it in to a meal soon enough, and I end up having to throw it away, rotten, smelly, and wasted. So, when I came across a recipe on bread-and-honey, for Kale Chips, I took note. It sounded a little crazy, and possibly too earnest & health-food-y. Like those icky substitute chips that you can get from Whole Foods, that taste like sandpaper garnished with sawdust.
Crunchy kale chips, what does that really mean? You will just have to trust me that they are good and jump in. Just rip up some kale (no tough stalks please), rinse the dirt off, dry the water off, mix it with just enough olive oil to lightly coat the leaves, spread it on a baking sheet, sprinkle on some sea salt, toss it in the oven, and wait for about 10 minutes. I can't really describe the results. Crisp, crunchy, light, salty, and addictive. I think that the simplicity and goodness of all of the ingredients keeps them from seeming like they are trying to be something else (like, say, potato chips). These can stand their own, they are easy, tasty, and made of good things.
Kale Chips
1 bunch of kale (or more!)
Splash of olive oil (just enough to coat the leaves)
Sprinkle of coarse sea-salt (not too much, keep in mind that the leaves shrink a little when they bake, so don't over-salt to begin with)
Pre-heat the oven to 350ยบ
Rip the kale leaves off of the stalk, breaking them into bite sized pieces. Rinse the leaves off well, making sure to get off all the dirt (and bugs!). Pat or shake the leaves dry, then pour a little olive oil in, tossing them together until all the leaves are lightly coated. Spread the leaves onto a baking sheet in one layer. Sprinkle with a little salt (err on the conservative side, you can always add more). Bake them for about 10 minutes, keeping an eye on them to make sure that they don't burn.
Wednesday, March 3, 2010
A Rainy Day
Comfort food comes in many shapes, flavors, and caloric intensities. This recipe is one of my favorites: warm, satisfying and full of carbohydrates. If you have a nice stash of bread-crumbs already on hand (the ones that you were saving for a rainy day, perhaps?) this recipe is a really low stress way to eat your other stresses away. If you need comfort food it is always a bonus if the process of making it is simple and to the point. All you need are some rosy red cherry tomatoes, a handful of parmesan, a couple of garlic cloves, and your pre-made home-made bread- crumbs and you are ready to go.
I discovered this recipe at Smittenkitchen. It is very forgiving - it changes a little bit every time I make it. It has never been bad, and almost always tastes better then the last time.
Baked Tomato Sauce
Cherry Tomatoes (small or large carton, depending on how much you want)
1/2 cup (+/-) bread-crumbs
1/3 cup (+/-) parmesan
2 garlic cloves (crushed or chopped finely)
Salt and pepper to taste
Olive oil (as necessary)
Fresh Basil (not necessary, but a good addition)
Pasta of your choice (I prefer a small pasta, like penne, fusilli, or even little elbows)
Pre-head the oven to 450°
Slice the tomatoes in 1/2 and spread them in a large baking dish, cut side up, and douse with olive oil.
Mix the bread crumbs with the parmesan, garlic, salt and pepper. Stir in a little olive oil, just enough to coat everything. Spread the bread-crumb mixture over the tomatoes and pop it in the oven for 20-30 minutes. The crumbs should be crispy, the cheese melty, and the tomatoes perfectly roasted. While the tomatoes are baking, put your pasta water on and cook your pasta. When everything is done cooking, drain the noodles, mix in the tomatoes, rip up some basil and sprinkle it on top (or not).
Tuesday, March 2, 2010
Not So Crumby After All
Homemade bread-crumbs.
This is not so much a recipe as a life choice. At a certain point in your cooking life you will inevitably come across a recipe that calls for bread-crumbs. At this point you will either buy a box of pre-made bread-crumbs or you will make some. This is a small thing, but it really does make a difference. It's so easy, and if you play your cards right, it can actually be a form of recycling, stretching out an old stale bread loaf's life and making it delicious again. I used to make bread crumbs fresh, the day of their intended use. However, this is totally unnecessary, because they keep very well. Just make a batch, seal it up, and keep it for a rainy day.
Bread Crumbs
Leftover Bread (the quality/type of bread you use will obviously determine the quality & flavor of the end product)
Whiz up your bread in the food processor or blender. You want small, uniform crumbs.
Spread your crumbs onto a baking sheet, and bake at 350° for 10-15 minutes or until golden.
Let them cool, and pack them into an airtight container.
Add them to recipes as called for and enjoy their superior deliciousness, and your resourceful thriftiness.
Subscribe to:
Posts (Atom)