Friday, January 7, 2011

Turning a New Leaf

It's been too long since I last posted! Oh well - it's a new year so I can begin again with more resolve (and recipes) then ever.

I made many, many batches of delicious cookies for christmas. I even discovered a chocolate cookie that my mom says is THE BEST EVER. But sadly, that was then, and this is now. Or to be more precise: it's January! I've been trying very hard to put an end to the holiday overindulgences. Number 1 on the agenda is not to bake any cookies for at least the first week of January (mission accomplished!). Also, I am trying to eat more vegetables.
Which brings us to today's recipe: the Kale & Spinach Smoothie. I know, it sounds gross. Even my mom, who still claims that the awful tofu cake she made me for my worst birthday ever was edible, responded to my description of this green smoothie with a resounding "Ick." But please don't let that dissuade you from trying this at least once. It's fresh and filling and full of good things and the flavors of green apple, banana, and orange juice dominate. It's surprisingly fruity and not vegetable-y. Plus it feels great to start the day on such a very brightly healthy note. I feel like no matter what I do wrong for the rest of the day, at least I started off right.

Testimonial: My boyfriend was a little doubtful when I first brought it up. At first he thought I was joking (kale smoothie! HA!), but when I told him I wasn't he got a little worried. However, once I got all of the ingredients and confirmed that I was going to make it the very next morning for breakfast, he actually pulled me out of bed early to ensure that I would have enough time to make it before he left for work. He described it as "good, better than what you can get from the store" (ie. green machine superfood).

We've been having it for breakfast every morning since then.

I made some changes to the original recipe, which I found on Joy the Baker. I substituted orange juice for almond milk - I like both the taste and the idea of having some of my breakfast OJ in my breakfast smoothie (more vitamins!). A nice side affect of using the orange juice is that you no longer have to add any sweetener (honey). Also, I swapped green apples for the pear. Personally I find pears to be a little bit grainy sometimes, and also a little bit pricy. Again, I really like the fresh bright favor that the apple gives the smoothie.
Kale and Spinach Smoothie
Adapted from Joy the Baker
Serves two

1 cup (packed) kale leaves, roughly chopped or torn
1 cup (packed) spinach leaves, roughly chopped or torn
1 1/2 cups orange juice
1/2 green apple, peeled and cut into chunks
1 banana, peeled and sliced

Wash the spinach and kale really well to get rid of all the dirt, sand and bugs that might be clinging to them. Remove the stem from the kale and rip of chop the leaves. Pinch the stems off of the spinach leaves, and rip or chop them up. Blend the spinach and kale with the orange juice until the leaves are well processed (I use my immersion blender so mine stays chunkier than if you use a blender, in which case all of the little bits should be blasted away). Add the chopped up apple and banana and blend again until a uniform consistency is achieved.

Pour into two glasses and drink away!

Thursday, October 14, 2010

A Pizza of Figs


Ok, now that everybody has the basic homemade pizza recipe down pat, we can move on to more exciting variations. Like grilling (on the barbecue!), adding fresh herbs to the dough (rosemary!), turning the whole thing into a fancy tasty plate for a fresh salad (arugula!), and taking advantage of fresh seasonal produce (figs!). What's great about this is that it is fancy and tasty but still affordable and healthy. Oh, and my mom really really likes fig pizza.

I've been wanting to try grilling pizza for a while, and I'm glad I finally took the plunge. It's really not complicated once you figure it out. One of the really nice benefits of grilling pizza on the barbecue is that you can avoid the awful overheated kitchen (or whole house) that comes from cooking a pizza indoors. As my dad pointed out, mine was a very successful "maiden voyage." As I suspected the whole process wasn't too difficult, and the combination of the rosemary in the pizza dough, and the sweetness of the figs with the tartness of the goat cheese all topped off with the peppery bite of the arugula was pretty perfect. Especially eaten in the backyard with a glass of wine on a warm evening.

Whole Wheat Herbed Pizza Dough
Makes 2 pizzas (enough for 4 people)

3/4 cups warm water
1/4 cup white wine
1 1/2 tsp active dry yeast (or 1 tsp instant yeast)
1 tsp honey
2 tsp salt
2 Tbsp olive oil
2 cups all purpose white flour
1 cup whole wheat flour
1-2 tsp finely chopped fresh rosemary

In a large bowl, dissolve the yeast in the warm water and wine, then stir in the honey, salt and olive oil. Add the flour and rosemary, stirring until it comes together. Sprinkle your workspace with flour (I prefer using whole wheat), dump the dough out onto the flour, and knead it for a couple of minutes, until the texture is smooth and uniform. Form it into a nice, neat ball.

Coat the inside of a large bowl with olive oil, and place your dough ball in it, coating the dough lightly with olive oil. Cover the bowl with plastic wrap and let the dough rise in a warm place for an hour or two until it has doubled in size.

Once the dough has doubled, place it back on the floured work surface and gently deflate it. Using a sharp knife, neatly slice the dough in half. Form each half into round balls, pinching the seams of the cut sides together. Wipe the excess oil out of the large bowl and turn it upside down over the dough and let it rise, covered, for 15-30 more minutes. After this step, you will stretch or roll the dough as thinly as possible, at which point you will be ready to grill them.

In order to grill the pizzas you will need to have your barbecue to be hot, and you will need to have your toppings prepared.

Toppings
Figs (I used 8 figs, sliced into rounds)
1/2 small Red onion (thinly sliced)
5 oz soft goat cheese
Arugula
Balsamic vinegar & olive oil

Put together all of your toppings so that you can spread them on your pizza quickly and easily while it is on the grill. Slice the figs into nice little circles (I recommend eating the little bottom pieces, just to remind yourself of how good they are). Break the cheese up into small chunks with your fingers. After thinly slicing the red onion, soak it in some hot water to help take the bite off since it won't be cooked very much (you can skip this step if you don't mind raw onions). Wash and dry the arugula and lightly dress it with a little bit of balsamic vinegar and olive oil.


By now you should have all of your toppings prepared, your pizza dough should be stretched to it's desired thinness & shape, and your grill should be hot. I recommend having an extra plate, a pair of tongs, a brush (for the oil), and a hot pad handy.

When you are ready to get started, spread a little bit of olive oil on one side of the pizza dough and flip the dough over, oil side down onto the grill surface. Close the lid and wait for a few minutes, until you can see some nice grill marks on the bottom. At this point you can either oil the top and flip the pizza over, or you can forget to flip it and just rotate it and top it (like I did, with much success). Spread half of the toppings evenly over each pizza, close the top and keep cooking it until the dough is cooked all of the way through, and the cheese is meltingly warm.

Slide the pizza onto a plate (or cutting board) and slice it up! Top it with a handful of the dressed arugula if you like.

Saturday, October 9, 2010

Pizza! Pizza! Pizza!


As I have mentioned previously, my family lived in a relatively rural area when I was growing up.  This meant that it took half an hour to drive to school (both ways!), 15 minutes to get to the closest grocery store, and 20 minutes to get to my best friend's house.  It also meant that we could not get pizza delivery (or any kind of delivery for that matter).  On the plus side we had a huge garden with lots of fresh vegetables, but while my brother and I may have enjoyed eating lemon cucumbers and cherry tomatoes straight off the vine, the elusive pizza held a special place in our imaginations.  

  Delivery pizza is the epitome of parents giving up all pretense of putting together a healthy meal - giving up so fully that they're not even pretending to get into the kitchen (or even the car).  Unfortunately for us, our parents were organized and unflagging in their efforts to provide us with healthy well balanced homemade meals.  On the few occasions that we went out for pizza, my brother would go all out, ordering "double cheese" and the ever exotic "hawaiian" pizza.  Our family's healthy eating habits often left us longing for a taste of all those things that normal parents let their kids eat.

When we finally moved to the "city" when I was in high-school, the revelation that we could have pizza delivered made us giddy at first.  We ordered some pizza, ate it, bemoaned how full and greasy we felt and promptly never did it again.

I think that I have finally found a way to bring pizza into our home: make it from scratch.  It's fresher, tastier, and healthier.  Plus it's really easy.  

Whole Wheat Pizza with Homemade Tomato Sauce
Adapted from Smittenkitchen
Serves two

6 Tbsp warm water
2 Tbsp white wine
3/4 tsp active dry yeast (or 1/2 tsp instant yeast)
1/2 tsp honey
1 tsp salt
1 Tbsp olive oil
1 cup white flour
1/2 cup whole wheat flour

Dissolve the yeast in the warm water and wine, then stir in the honey, salt and olive oil.  Add the flour, stirring until it comes together.  Sprinkle your work surface with some flour (I like to use whole wheat), dump the dough out onto the flour, and knead it for a couple of minutes, until the texture is smooth and uniform.  Form it into a nice, neat ball.

Coat the inside of a medium sized bowl with olive oil, and place your dough ball in it, coating the dough lightly with olive oil.  Cover the bowl with plastic wrap and let the dough rise in a warm place for an hour or two until it has doubled in size.  Alternatively, you can make the dough in the morning and put it in the refrigerator for the day for a very slow rise. It should be ready for the second step by the time you get home from work in the evening.  

Pre-heat the oven to 500.
Once the dough has doubled, place it once again on a floured work surface, and gently deflate it by pressing down on it with the palm of your hand.  Form it back into a ball, and leaving it on the work surface, cover it loosely with plastic wrap, a dishtowel, or an upside down bowl.  Leave it for another 15 minutes or so, then roll it, stretch it, or press it out into as thin as you can get it without ripping it.  

Put it on a the surface you want to cook it on with a little bit of cornmeal sprinkled on the bottom to keep it from sticking.  Top it with your homemade sauce and some shredded mozzarella cheese (not too much).

Bake it on whatever surface you have available (pizza stone, baking sheet, large cast iron skillet), for 10-15 minutes or until it is done.  You want to make sure the dough cooks completely - you can lift a corner of the pizza up and peek underneath to see if the bottom is still doughy or beginning to crisp up if you are having trouble telling if it is done.

When the pizza is done, take it out, slice it, and top it with fresh basil if you have it.

Pizza Sauce
You can start making this sauce while the dough is rising.

4 medium or 3 large Tomatoes or 1 can of tomatoes (with their juice)
1 Tbsp olive oil
2 cloves of garlic (minced)
Splash of white wine
Salt to taste

You can remove the skins from the tomatoes if you want, but I actually don't think it is necessary.  If you want to, just x the bottoms of the tomatoes and submerge them in boiling water for about a minute - the skins should peel off easily.

Put a small pot on the stove over medium heat with a tablespoon of olive oil.  When the oil is warm, add the minced garlic, and cook it, stirring for a couple of minutes - until it is fragrant (don't let it brown though, that will make it bitter).  Add the tomatoes and the wine, and simmer for 30 minutes or so, stirring occasionally.  It should be very juicy at first, and but by the time it is done it should have thickened up quite a bit.  Once it's done, add salt to taste and then spread it on your pizza.

Friday, September 3, 2010

You Say Tomato, I Say Tomatillo


I've been searching for this recipe for a long time.

When I was in kindergarten my family moved from Los Angeles to a rural area in Sonoma. One of the many exciting things about our new home was the enormous garden that my parents grew. They were very serious about doing it right, and spent days (weeks?) clearing out the area of native rocks and building a tall fence to keep out the deer. Organic growing being a priority, green crops were planted in order to put more nutrients in the soil.

Their hard work was rewarded by bountiful cherry tomato plants (I think that some of the plants may have exceeded my small stature at the time), sweet and earthy home-grown carrots, and an abundance of strange sticky green tomatillos.

I remember being perplexed by the tomatillos. They felt weird, smelled funny, and I had no idea what their purpose was. In my memory we never made anything with them, although I'm sure we must have.

Around that time, my family began going to a mexican restaurant in Sonoma that is still one of our favorites: Juanita Juanitas. Every visit there begins with a bin of their delicious crispy salty chips, and a cup of their wonderful tomatillo salsa. I love that salsa. Whenever I visit my parents I crave it. I don't think that I ever made the connection between the salsa and the sticky green fruits from our garden when I was little, but lately I've been wondering if I could find the secret to the transformation.

Well, thanks to my new favorite cookbook, A Platter of Figs, I think I've figured it out. As I suspected it is very simple. Unfortunately, it's just not the same without those chips.
Tomatillo Salsa
Adapted from A Platter of Figs by David Tanis
This is halved from the original version. It made quite a bit of salsa.

1lb Tomatillos (look for small, fresh & firm tomatillos)
1/2 yellow onion (thinly sliced)
1 Garlic cloves (minced)
1-2 jalapeno peppers (depending on how spicy the peppers are and how spicy you want the sauce to be, Sliced)
Salt to taste
1/2 of a large bunch of cilantro (leaves and stems chopped)

Slide the husks off of the tomatillos and detach them by pinching off the stem. Once the tomatillos are prepared, place them, along with the sliced onion, garlic and jalapenos* in a medium sauce pan and cover everything with water. Add 1/2 tablespoon or so of salt, and bring the water to a boil.
Once the water has begun to boil, remove the pan from the heat and let the mixture cool (I fished all of the ingredients from the water at this point and spread them out on a plate so that they would cool more quickly).
Put the cooled cooked ingredients into a food processor, add the cilantro and whiz it until it is a uniform texture. It should be green, frothy and delicious. Taste it for spiciness and saltiness and adjust as desired. You can add a little bit of the cooking water if you want it thinner.

Scoop it up with chips and spoon it over tacos, burritos, fish, or chicken (or straight into your mouth).
*If you are worried about the spice you can put in part of the jalapeno at this stage and then add more to taste at a later stage.

Saturday, August 7, 2010

Banh Appetit


I deeply dislike my Bon Appetit subscription. It was supposed to be my complementary Gourmet subscription, which came with their cookbook. Unfortunately, by the time I sent in my claim, Gourmet had gone under and Conde Nast tried to convert me by substituting Bon Appetit. It's free, and I have few other food magazine choices so I decided to give it a try. Actually, that may be an overstatement. I have resented every issue. I hate it. I hate the pictures. Why is everything so dark and shiny? The food looks greasy, severe, staged, stylized and extremely unappetizing. I loved the pictures in Gourmet, I wanted to try everything. While my old issues of Gourmet are a filled with post it notes marking the recipes I want to make, I have marked only two recipes in all of the Bon Appetit magazines I have received. To be honest, I was only really excited about one of them, a recipe for Pork Meatball Banh Mi.

Banh Mi are French-Vietnamese sandwiches, made with a baguette filled with sweetly pickled shredded carrots and daikon radishes, fresh sprigs of cilantro, crunchy slices of hot jalapeno peppers, a slather of mayonnaise, and some sort of meat (often pork). What's great about these sandwiches is that they are very flavorful and usually very cheap. What's not so great is that the meat inside is, in my experience, often not very good. Which is why I was excited to make banh mi myself. Fortunately, all of the ingredients for these sandwiches were inexpensive but the end result tasted delicious rather than cheap. The meatballs were especially flavorful: spicy and savory. Moist on the inside, browned on the outside.

There were a few little things I changed about this recipe. First of all, the amount of sugar for the daikon and carrots seemed overwhelming. I tried to trust the recipe as it was written, but after I had added the sugar, vinegar and salt to the vegetables I could not imagine the mixture somehow turning into something palatable, so I dumped the mixture into a strainer to remove as much of the sugary slush as possible and then I put the vegetables back in the bowl with a little more vinegar and salt. It ended up tasting perfect. To put the sugar/vinegar amounts into perspective, a recipe for chicken banh mi from Gourmet calls for about half as much of the vegetables mixed with 1/2 cup rice vinegar, and 1 Tbsp sugar. I think something closer to those amounts would be more reasonable then the 1/4 cup each of rice vinegar and sugar called for in the Bon Appetite recipe (I also found that I had much more of the pickled vegetables than I could have possibly used).

Another thing I balked at was the cornstarch in the meatballs, so I substituted flour. Last but not least, I made 1/2 a batch of the sriracha mayonaise, and 1/2 a batch of sriracha yogurt (I substituted plain yogurt for the mayonnaise). I really don't like mayonnaise, and I liked the yogurt mixture better. Kevin, on the other hand, ate the mayonnaise sauce and liked it.
Pork Meatball Banh Mi
Adapted from Bon Appetit
Makes enough for 4

Sandwich Components
Pickled carrots and Daikon Radishes
Sriracha Mayonaise or Yogurt
Pork Meatballs
Fresh Cilantro leaves
Thinly (or thickly) sliced jalapeno
Baguettes (4 small or two large)

Pickled Carrots and Daikon Radish (I recommend halving this)
2 cups carrots (the recipe says to coarsely grate them but I prefer to cut them by hand into matchsticks)
2 cups diakon radishes (again, coarsely grated or cut into matchsticks)
1/4 cup rice vinegar
1/4 cup sugar (I suggest cutting this down a lot, try a tablespoon and see how it tastes)
1 tsp course kosher salt

Stir these indgredients together an hour or two ahead of time and let it sit at room temperature, stirring occasionally.

Sriracha Mayonaise (or Yogurt)
2/3 cup mayonaise (or plain yogurt)
2 green onions (finely chopped)
1 Tbsp Sriracha (this makes a pretty spicy sauce - you might start by adding a little at a time to taste to tailor its spicy-ness to your liking/tolerance)
Salt to taste

Mix all of the ingredients together. You can make this ahead of time, just cover it and put it in the fridge.

Pork Meatballs
1 lb ground pork
1/4 cup fresh basil (finely chopped)
4 garlic cloves (minced)
3 green onions (minced)
1 Tbsp fish sauce
1 Tbsp sriracha
1 Tbsp sugar
2 tsp cornstarch (or 4 tsp flour)
1 tsp black pepper
1 tsp coarse kosher salt

1-2 Tablespoons sesame oil (to fry the meatballs in)

Gently mix all of the ingredients together, except the sesame oil. With moist hands, roll tablespoon sized balls out of the mixture.

Pre-heat the oven to 300.
Heat a tablespoon of the sesame oil in a skillet over medium heat. When the oil is warm, add half of the meatballs. Be careful of the hot oil, if it is sizzling too much you can turn the heat down a little. Saute the meatballs, turning occasionally, until they are cooked all the way through (slice one in 1/2 to check). They should have a nice brown crust. When the first batch is done, put them in a pie plate and place them in the oven to keep them warm. Add a little more oil to the pan and repeat this process with the rest of the meatballs.

When all the meat has been cooked, assemble your sandwiches however you like. You might taste the different components for spicy-ness first so you can get it just right. One of the cafes where we get banh mi always hides one HUGE slice of jalapeno in its sandwiches, which is always a very unwelcome surprise when you bite into it. (Actually, it is less of a slice than just a full half of a jalapeno.) Personally, I prefer a few slivers of jalapeno, plenty of yogurt sauce and lots of meatballs, cilantro, and pickled vegetables.
Everything keeps well in the fridge, so if you have leftover ingredients save them for later.

So, yes, this Bon Appetit recipe was good. Really good, in fact. But I can't imagine it being so good if I had followed the recipe exactly as printed, and I was especially glad to have the Gourmet version to help me alter it.

Saturday, July 24, 2010

Peach & {Wild} Blueberry Cobbler


Except for a handful of stragglers, I have now used up the last of my wild blueberries. I made several batches of pancakes, a dud of a broiled-yogurt dish (we ate it but we did not enjoy it), and last but not least a cobbler.

Now I want to mention something that has been on my mind a lot lately: I don't like really heavy rich desserts (or savory dishes either actually). They make me feel bad inside and out. I particularly find that I don't like it when fresh delicious (and precious) fruit is suffocated in butter and sugar. Basically, I have been searching out recipes that show off my lovely produce, rather than stifle it.

This cobbler is very summery, and the fruit is very straightforward. The combination of blueberries and juicy baked peaches is sticky perfection. The cornmeal-buttermilk-biscuit topping is tender and rustic and neither too sweet or too heavy. Let's just say that we had firsts, seconds, and then polished off the leftovers for breakfast.
Peach and {Wild} Blueberry Cobbler
Adapted from Smitten Kitchen's adaptation from Simple Fresh Southern

Fruit*
4 cups peaches (1 1/2 lbs), pitted, peeled** and sliced
2 cups (1 pint) blueberries, rinsed and dried
2/3 cup packed brown sugar
2 Tbsp flour
2 Tbsp lemon juice
1/4 tsp ground cinnamon (I left this out)
1/4 tsp salt

Biscuit
3/4 cup all-purpose flour
1/4 cup cornmeal
3 Tbsp brown sugar
1 1/2 tsp baking powder
1/4 tsp salt
3 Tbsp cold unsalted butter, cut into pieces
1/2 cup buttermilk

Preheat the oven to 425°. Toss peaches with blueberries, sugar, flour, lemon juice, cinnamon (if you are using it), and salt in the bottom of a 2-quart ovenproof dish (because I halved the fruit I used a pyrex pie dish).

Make the biscuit dough. Stir together flour, cornmeal, sugar, baking powder and salt. Mix the butter into the flour mixture with a fork, pastry cutter or your hot little hands. Stir in the buttermilk until the dough comes together.

Drop spoonfuls of the dough over the filling. Bake until the juice from the fruit is bubbly and the tops of the biscuits are browned, 20-25 minutes.

Be careful: it's sticky, addictive, and I'm pretty sure it stains.
*I halved the amount of fruit so that it would be a better amount for two (just enough for seconds the night of, and maybe a little bit for breakfast the next day). The ratio would have been better with more fruit though.
**As smitten kitchen suggests, a simple way to peel the peaches skin off is to slice an X into the bottom of each peach and then submerge them in boiling water for 30 seconds.

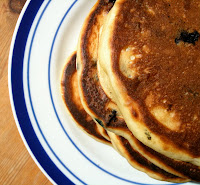
Homemade Buttermilk Pancakes with Wild Blueberries

Blueberry pancakes may be unoriginal but they are very good. The way that the blueberries cook within the pancake batter so that they get hot and juicy and practically burst is reliably delicious. I was especially happy to find a recipe for buttermilk pancakes that is very simple. In fact, it is so easy to make and requires so few ingredients that it puts box mixes to shame.

The recipe I followed, from Gourmet Today, was for plain buttermilk pancakes--a simple base ready to be adapted in any number of ways. I added half a cup of blueberries, but if a plane trip to New Hampshire for fresh-picked berries sounds too indulgent, you can follow Gourmet's suggestion of sour cream and caviar. So versatile!
Buttermilk Pancakes (with blueberries)

From Gourmet Today

1 cup all-purpose flour
1 tsp baking soda
1/2 tsp salt
1 large egg (lightly beaten)
1 cup well-shaken buttermilk*
vegetable oil for brushing the griddle

1/2 cup blueberries (optional)

Whisk together flour, baking soda, salt, egg, and buttermilk in a bowl until smooth. Gently stir in the blueberries.

Heat a griddle or a large heavy skillet over moderate heat until hot enough to make drops of water scatter over its surface. Brush with oil (It doesn't need much oil at all - I like to wipe the oil with a paper towel before each batch so that it is barely there).

Working in batches, using a 1/4 cup measure filled halfway for each pancake (I used about double this amount), pour the batter onto the griddle and cook pancakes, turning once, until golden.

If you like, you can place the cooked pancakes onto a heatproof platter, cover, and keep them warm by placing them in a 200° oven while you cook the remaining pancakes.
*Buttermilk is the only ingredient that I don't always have in the refrigerator. Luckily, there are several ways to come up with a substitution in a pinch. One way is to mix 1 Tbsp lemon juice or white vinegar to a cup of whole milk, which will make it curdle and thicken and sour. The other way, which I much prefer, is to thin 2/3 cup yogurt with 1/3 cup water. I think that the yogurt substitution is much tastier and the tangy plain yogurt is more substantial and appealing. The other versions are a little funky and often have a strong lemony (or worse) vinegar-y flavor.